The first step in preparing a toroid for installation is to cut some magnet wire to the length specified in the build instructions. If you really want to play it safe (such as if you’ve never wound toroids before), you might want to cut off an extra inch or two to give yourself a safety margin. It’s a bit more painful to unwind the toroid when you run out of wire than it is to clip off some excess.
Put the first turn on the toroid by inserting the wire through the center of the core. Leave about 1 inch/2 cm of wire on one side of the core, then form the wire so that it wraps firmly around the outside of the core. Take the long end of the wire and place it again through the center of the core, in the same direction as the first turn. Pull the wire through the core and snug it up against the toroid body. Be careful when snugging the wire that you don’t scrape off the wire enamel, which could give you an unexpected short.
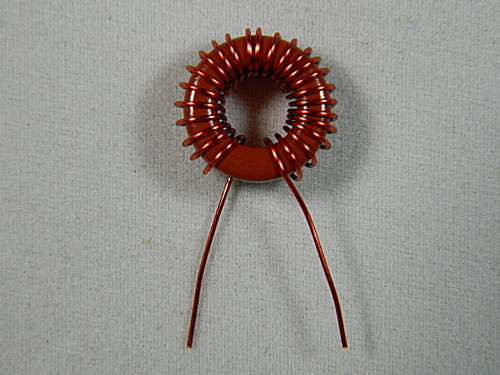
Continue wrapping the wire in this way until you get the desired number of turns. Do not cross the wire over itself during the winding. Remember that each passing of the wire through the center of the core counts as one turn, so the initial placement of the wire is counted as your first turn. Trim off any excess wire length so that both leads are around 1 inch/2 cm long. Ideally, there should be about 30° of the toroid not wrapped with wire, so you may need to expand or compress the turns to get the desired coverage of the core. The picture below shows the amount of wire coverage you want on a core.
The magnet wire provided with the CRX1 is heat-strippable, so you don’t have to prepare the leads before installing it into the PCB. Place the leads in the holes in the PCB, bend the leads sticking out the back side of the PCB to temporarily secure it to the PCB, then solder the leads to the pads using a medium-sized soldering iron tip. Apply enough heat to the joint to ensure that the heat-strippable enamel coating is burned off the wire and that there is good solder flow from the lead to the pad. Once both leads have been soldered, check that there is 0 ohms resistance between the two pads to ensure good solder joints, then clip the excess wire.